Much to do With Wooden Spars | Ep. 355
Working on the hardstand during a comprehensive boatyard refit of Ruth Avery, Kevin Boothby confronted rotted wood inside the spar of his Gilmer 31 gaff-rigged cutter. Documenting the traditional woodworking procedures for How to Sail Oceans, Boothby set out to build a replacement timber insert using a bi-directional scarf joint. Rather than attempting a cosmetic surface patch, the rotted section demanded an extended timber wedge fitted flush into sound wood to restore full structural integrity to the rig.
Cutting and Bonding the Mast Scarf Joint
Constructing the mast scarf began by laying out the slope across a fresh timber block to create a long, bi-directional wedge. Boothby marked the taper lines across both sides of the wood, then used a crosscut saw to cut down to the layout marks at regular intervals. With the relief kerfs established, he took a wood chisel to knock away the wastage before truing and fairing the mating surfaces with a hand plane. Modern epoxy formulation eliminated the unforgiving joinery tolerances demanded by historic glues.
As Boothby explained while fitting the replacement timber, “Epoxy will fill the gap and the bond will be just as strong as if it was just one piece of wood.” He applied an initial wet-out across the joint using straight, unthickened epoxy, smushing it deep into the grain. To bridge irregularities without sacrificing structural strength, he blended 404 thickening compound into the resin mix. After spreading the thickened epoxy across both mating faces, he clamped the timber securely and left it for an overnight cure.
Once the epoxy cured solid, Boothby returned with his crosscut saw to saw down into the remaining exterior wastage. He cautioned against rushing the stock removal: “Don’t get too greedy. Cuz if you go too far, then you have to glue more wood back on.” He worked through multiple measured iterations, sawing and chiseling away the excess timber before switching to a bevel plane and sander to bring the scarf perfectly flush with the mast profile.
Sealing and Sheathing the Topsail Throat
Between timber operations, Boothby addressed the topsail throat hole to safeguard against internal moisture damage. He mixed penetrating epoxy further thinned with rubbing alcohol, designed to saturate deep into the raw end grain. After taping the underside of the hole to restrict drainage, he poured the thinned resin directly into the throat and allowed it to soak in slowly like sand through an hourglass, ensuring no rainwater could seep down into the timber fibers to initiate rot.
Once the penetrating epoxy saturated the wood, Boothby reinforced the opening by installing fiberglass roving inside the bore. He dripped resin into the fibers to create a composite internal sleeve. This protective fiberglass liner formed a smooth, sealed interior sheath that prevents line friction and stops standing rainwater from penetrating the wooden spar structure.
Ground Tackle Overhaul and Anchor Preparation
Taking advantage of down time during resin cures, Boothby serviced his ground tackle. He applied fresh paint to his older 44-lb Spade anchor, which serves aboard Ruth Avery as a secondary storm bower. While Boothby relies on a 44-lb Vulcan as his primary working anchor, the Spade remains a dependable heavy-weather backup despite its tendency to rust.
To upgrade the secondary rode, Boothby prepared a 10-ft length of 3/8 chain to shackle to the Spade anchor shank. The short chain leader provides sufficient weight to hold the anchor shank flat against the seabed for optimal holding power, while keeping the total weight manageable enough to row out and deploy from the rowing dinghy during rough weather.
Shaping the Topsail Yard and Jackyard
With the mast repair and ground tackle complete, Boothby turned to building a new yard and jackyard for a larger gaff topsail. He began by drilling line pass-through holes at the spar ends while the stock remained square dimensional lumber. Drilling early made measuring and locating exact spar centers far simpler than trying to center holes on rounded timber. The finished holes will secure lines passing through the head cringle, bottom luff cringle, clew, and foot.
Next came tapering each end of the spars. Because the halyard secures near the center of the topsail yard, maximum bending forces concentrate at the midpoint while stress diminishes toward the tips. As Boothby noted, “And a taper not only looks nicer, but it’s also maximally efficient in terms of weight.” He marked taper lines on the timber sides, cut relief cuts about every inch down to the layout marks with a crosscut saw, chiseled away the waste chunks, and smoothed the flats with a bevel plane.
To transform the tapered square timbers into rounds, Boothby converted the square cross-section into an eight-sided octagon resembling a stop sign. He marked lines approximately one-third in from each square edge, sawed off the four exterior corners, chiseled the waste, and planed the flats smooth. Upon roughing out the spars, he noted a slight spring in the wood: “There’s internal stresses and strains inside the timber. So, when you rip it out, it springs on you and you get a bend in it.” The rough octagons stood ready for final rounding with hand planes and sanding to eliminate all saw notches.
Frequently Asked Questions
Kevin marks the taper on both sides of the timber block, makes relief kerfs down to the layout marks using a crosscut saw, knocks away the wastage with a wood chisel, and planes the surface fair before bonding.
Kevin wets out the joint with straight epoxy and blends 404 thickening compound into the resin to bridge joinery gaps, ensuring a bond as strong as solid wood without requiring perfect wood-to-wood contact.
Kevin tapes the underside of the hole and pours penetrating epoxy thinned with rubbing alcohol into the topsail throat to soak deep into the grain, followed by a fiberglass roving sleeve saturated with resin.
Kevin uses a 44-lb Vulcan as his primary working anchor and readies an older 44-lb Spade anchor as a secondary storm bower, adding a 10-ft length of 3/8 chain to help hold the shank down while remaining deployable by dinghy.
Drilling line pass-through holes while the timber is still square lumber makes finding and measuring the exact center much easier and more precise than attempting to drill an already rounded spar.
Kevin marks layout lines roughly one-third in from each corner, saws off the square edges, and chisels and planes the timber into an eight-sided octagon resembling a stop sign prior to final rounding and sanding.
Water adventures near Nassau








Private Rose Island Swimming Pigs Snorkeling and Turtles
Sold by Bahamas Land And Sea Tours

Swimming with Pigs in Nassau, Transportation Included
Sold by J&S Tours & Swimming Pigs

Exuma Elite Escape: 7-Stop Luxury Swimming Pigs Tour from Nassau
Sold by 3Ns Vacation ServicesSupport How to Sail Oceans
At WeBoating.com, we profoundly acknowledge the unwavering dedication that How to Sail Oceans invests in crafting each and every video or voyage. Their passion for delivering exceptional ocean content shines through every frame, and it's a labor of love that deserves your attention.
We invite you to watch their captivating videos here and actively engage with their content, including their social media links above. Liking, commenting, and sharing their work goes a long way in fueling their creative fire.
We're also inviting you to explore the gear, sponsorships, and boat partnerships highlighted in the "Much to do With Wooden Spars | Ep. 355" video description, or directly on YouTube. By engaging with these offerings or purchasing services and items, you directly support How to Sail Oceans, their collaborators, and the brands they're associated with.
To ensure you never miss an offshore update, consider visiting their official YouTube Channel to subscribe, like, and join their community directly.
If you have any feedback, corrections, or additional information about How to Sail Oceans or their videos, please use the comment form below to share your thoughts with us.
Thank you for being a part of our community and supporting the creators we cherish. Your time and support truly matter!
Alright woodworking fans, this video is for you! I complete the scarf to go into the rotted portion of the mast. I also put in the tapers for the new yard and jackyard, and turn the square cross section into an octagon, which is the first step toward making the spar round.
SUPPORT HOW TO SAIL OCEANS ON PATREON: https://patreon.com/user?u=12372934
HOW TO SAIL OCEANS ON RUMBLE: https://rumble.com/c/c-1981134
HOW TO SAIL OCEANS TEE SHIRT: https://maritimetees.net/search?q=how+to+sail+oceans
DONATE: https://www.paypal.me/KevinBoothby
WEBSITE: https://www.kevinboothbysailing.com
VIDEO SOUNDTRACKS: https://soundcloud.com/user-177118317
CAMERAS:
Canon EOS R6 Mk II with RF 70-200mm L IS zoom lens
Go Pro Hero 9 Black
Go Pro Hero 12 Black
Go Pro Hero 13 Black
DRONE:
DJI Phantom 3 Professional
THE BOAT: Design: Gilmer 31; LOD 31', LWL 25', Beam 9.5', Draft 4.5', Displ. 13,600lbs

How to Sail Oceans
Kevin Boothby, PhD, documents the forensics of engineless blue-water voyaging. Join his 2026 Bahamas expedition aboard the Gilmer 31 cutter, Ruth Avery.
Channel Information:
Social Media Links:
Much to do With Wooden Spars | Ep. 355 Location
- Broad Creek Boatyard, Deltaville, Virginia, USA (37.55,-76.327)
Latest Episodes from How to Sail Oceans
Explore the most recent voyages. Subscribe to the channel to never miss an update!
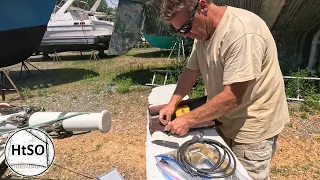
The Haulout “Third Quarter” | Ep. 356
Working through the middle stretch of a boatyard haulout, Kevin Boothby refits the wooden spars and hull of the Gilmer 31 Ruth Avery, applying epoxy barrier coats, servicing rigging, and stepping the rig.
Much to do With Wooden Spars | Ep. 355
Kevin Boothby repairs rotted timber on the mast of Ruth Avery using a bi-directional scarf joint and shapes a new yard and jackyard for a larger gaff topsail.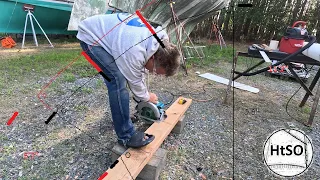
Grand Designs | Ep. 354
Well the work season is now in full swing. Repairs, replacements, upgrades--its all happening. One upgrade is a new and larger topsail. The old topsail did not set correctly on account of the luff being too short, which meant the halyard attachment point was too close to the head causing the sai...
I Jinx It | Ep. 353
Kevin Boothby pulls the Douglas fir mast of Gilmer 31 Ruth Avery for 5-year maintenance, unrigs the heavy bowsprit, and discovers rot in a spar glue joint.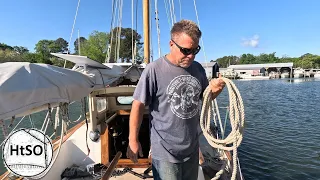
Back to Work | Ep. 352
Sailing through the narrow, dredged channel into Broad Creek on a cold, blustery day was quite the season finale for 2025-26. Now it's time to get to work. This is a mast pull year (every 5 years for me), so it will be a longer than usual haulout. SUPPORT HOW TO SAIL OCEANS ON PATREON: HO...