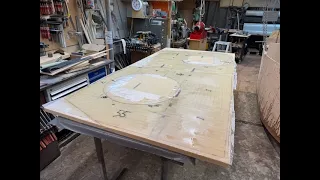
2 August 2022 Cutting the CB in G 11 epoxylaminate. A mistake and a close call on the CB-trunk.
With the mockup as a pattern I draw the shape of the centerboard on the G 11 epoxylaminate. It is very hard and difficult to shape but modern tools like jigsaw blade covered with carbide-tungsten grit made it much more easy than outherwise would have been. Still it was slow work but not difficult.
Next was gluing the two halves of the centerboard-trunk together.
I had been focust and made shore that the strong sides with double laminate where facing each other as they are mirror left and right.
Then I relaxed I put cupper powder on the inside. But one side got the cupper powder on the outside. The cupper powder is intended as antifouling. I had no more cupper powder so it have to do as it is.
Then to get pressure I used my big clamps. They are powerfull and did bend the two sides so close that there was not enough space for the centerboard.
Luckily before the NM-epoxy cured and hard, a short time I noticed my mistake.
I knocked three 15 mm pieces into the slot with a big hammer and big force. Fear making me strong.
Then the following night I lost sleep trying to figure out how to remove the pieces.
Luckily they came out easy.
If you’re interested in contributing links are below.
https://www.paypal.com/donate?hosted_button_id=2MYSYADM4594Q
Swift 0706200550
Support Sven Yrvind
At WeBoating.com, we profoundly acknowledge the unwavering dedication that Sven Yrvind invests in crafting each and every video or voyage. Their passion for delivering exceptional ocean content shines through every frame, and it's a labor of love that deserves your attention.
We invite you to watch their captivating videos here and actively engage with their content, including their social media links above. Liking, commenting, and sharing their work goes a long way in fueling their creative fire.
We're also inviting you to explore the gear, sponsorships, and boat partnerships highlighted in the "2 August 2022 Cutting the CB in G 11 epoxylaminate. A mistake and a close call on the CB-trunk." video description, or directly on YouTube. By engaging with these offerings or purchasing services and items, you directly support Sven Yrvind, their collaborators, and the brands they're associated with.
To ensure you never miss an offshore update, consider visiting their official YouTube Channel to subscribe, like, and join their community directly.
If you have any feedback, corrections, or additional information about Sven Yrvind or their videos, please use the comment form below to share your thoughts with us.
Thank you for being a part of our community and supporting the creators we cherish. Your time and support truly matter!
Sven Yrvind
At 86, Sven Yrvind is still pushing the limits of small-boat design. Discover the philosophy and technical grit behind his 'Exlex' series.
Channel Information:
Social Media Links:
Latest Episodes from Sven Yrvind
Explore the most recent voyages. Subscribe to the channel to never miss an update!
Mockup – No Ballast, Deckhouse Buoyancy for Self Righting
This Youtube channel is about me Sven Yrvind. I am 87 and a half years old dyslectic solo sailor. I am building a plywood test boat for a Divinycell and NM-epoxy high-latitude cruiser. She will be about 4.5 meter or 14 feet and 9 inches long, the beam 1.36 meter, 4 feet 6 inches. She is a two mas...
The two bulkheads weakly installed.
This Youtube channel is about me Sven Yrvind. I am 87 and a half years old dyslectic solo sailor. I am building a plywood test boat for a Divinycell and NM-epoxy high-latitude cruiser. She will be about 4.5 meter or 14 feet and 9 inches long, the beam 1.36 meter, 4 feet 6 inches. She is a two mas...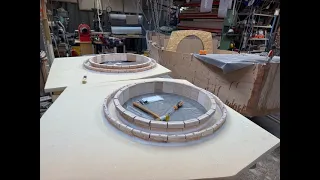
The Outer Coaming and Fiberglassing the Inner One.
Sven Yrvind fits the outer spray skirt coaming and laminates fiberglass onto the inner coaming in his workshop, refining his rope attachment setup and filleting the joint defenses.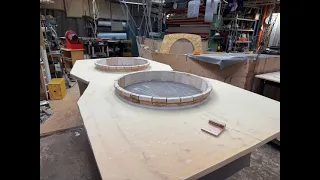
Starting the Inner of Two Spray Skirt Coamings.
Sven Yrvind works in his workshop cutting and fitting inner and outer spray skirt coamings, detailing kerf measurements and fiberglass reinforcement.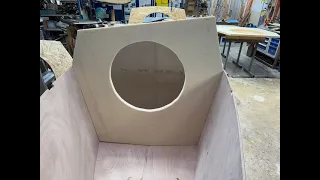
Cutting the Divinycell Bulkheads.
In his Västervik workshop, Sven Yrvind shapes composite bulkheads and constructs rounded hatch coamings with dual spray protection for his compact ocean cruiser, verifying hull symmetry and deck crown alignment.