Keel Trunks, Batteries And Gudgeons
If you're going to own a boat, you'd better enjoy fixing it. That or have endless funds to pay someone.
Transcript:
So, about that keel trunk damage, truth is it's been there a while, and it's high time it got fixed, as it's partly responsible for why I took on water during my last trip.
Here's what it looks like now.
Still a bit of a gap at the front. Here's the keel cap and the weather striping which obviously needs replacing. Pull off the old stuff.
That surface looks like it's going to need some cleaning up. So, I think I'm probably going to remove the keel cap. Removing the keel cap bolts.
Keel cap off
to remove this old glue.
How best to do that? 60 grit sandpaper seem to do the trick. and finished cleaning it with acetone. Refitting the cap.
More anti-seas needed. Keel bolts back on with anti-seas. Okay, ready to apply the new weather striping. That's what it looks like. I used contact cement in the end to fix the uh weather striping and then clamped batterns underneath to apply pressure to the rubber to get it to adhere. So the other day I forgot to raise the uh trailer tongue wheel jack and this is what happened.
Oh, it's really old. Anyway, it's time for a new one. First problem is how to get those nuts off. Cut the buggers off with a hacksaw. That and the lump hammer took care of it. There's the new one. Fully hot dip galvanized. Well, that wasn't too bad. Went on pretty easy.
This is the existing battery tray that I've removed from modification. That's where the batteries mounted just forward of the compression post. Well, I'm mad as heck and I'm not going to take it anymore. The new battery has arrived damaged. What's more, the pirates that sold it to me are trying to wash their hands of it. Apparently, the package that it arrived in is not the package they shipped it in. But the fact remains that this is what I received. Shipped by UPS, but arrived in an Amazon box. That's not my foot, but this is my new battery and it looks great. Modifying the battery tray to make it fit the bigger battery. I've removed the old end supports that fits on the tray nicely.
There's the tray in situ. There's the battery in situ. Here's a better view with better lighting. Had to remove all of this electrical in order to get the battery in.
I've got to drill a hole blind. You can just see the bracket in the mirror there. So, that's the uh new bracket holding the bulkhead, which in turn stops the battery from going forward. And there it is, the finished install. That thing is solid. It's strapped down with a ratchet strap. That's what it looks like from the other side. The charger is charging at 14.3 volts.
What was that? About thousands and thousands of seabirds.
And those are feeding.
Imagine how many fish there must be in the sea if they have this many birds.
Yep, I done caught me some fish.
Oh dear. Retrieving Jonah under these conditions is going to be tough.
She's going to have to wait until the surge at the boat ramp is down.
I've got a freaking tsunami.
Still about a quarter inch short there. That is loose.
Yay. Back in dry dock now.
There's the upper gajjun.
And there's the lower gajun. They're old, loose, and worn. Here's the shiny new gajun with the plywood backing plates. Should be solid. This is me removing the bolts and nuts on the gudgeon from the inside of the boat. The view up into the quarter birth.
Definitely wiggling. Here's the new one. A lot less wiggle. No, not awkward at all.
cleaned off the but tape with acetone. The supplied bolts are too long and the threads don't go far enough down.
I've epoxied the old holes. That's the lower gudgeon mounted with the butil tape starting to squeeze out. The only problem with this butil tape is that it just keeps oozing out. One needs to get a putty knife and just run it along there and take it off.
So, I've attached the mole grips and then secured it with a line so that I can go inside the boat and tighten the nut. There's the finished up gajudon.
There's the lower gajun. So, one thing I've found with my preventor line is that it's not easy to release it um under load when I might need to do so in a hurry. So, I'm going to add these cam cleats.
Here's the arrangement I'm proposing.
This will be easily released from the cockpit.
John Jordan Sailing and Sea Stories
Storied adventures in small sailboats on the ocean, and vlogging my own outings multi-day coastal cruising in a 19' sailboat (S/V "Jonah", a West Wight Potter 19). Please subscribe to my channel as we travel the California coast, or simply subscribe for the sea stories!
Channel Information:
Social Media Links:
Support John Jordan Sailing and Sea Stories
At WeBoating.com, we profoundly acknowledge the unwavering dedication that John Jordan Sailing and Sea Stories and other creators invests in crafting each and every video. Their passion for delivering exceptional content shines through every frame, and it's a labor of love that deserves your attention.
We invite you to watch their captivating videos and actively engage with their content, including their social media links above. Liking, commenting, and sharing their work goes a long way in fueling their creative fire.
We're also inviting you to explore any sponsorships and partnerships highlighted in the "Keel Trunks, Batteries And Gudgeons" video description, or directly on YouTube. By considering their offerings or purchasing services and items, you not only support John Jordan Sailing and Sea Stories but also the brands and collaborators they're associated with.
If you have any feedback, corrections, or additional information about John Jordan Sailing and Sea Stories or their videos, please use the comment form below to share your thoughts with us.
Thank you for being a part of our community and supporting the creators we cherish. Your time and support truly matter!
John Jordan Sailing and Sea Stories Lastest Videos
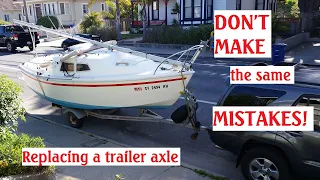
Replacing a Boat Trailer Axle ~ Measuring, Removal, Installation
In this video, i'm going to be covering the replacement of my trailer axle and hubs. I'll detail; - how to measure up for the new axle - removing the old axle - what to do if the hub is reluctant to go on the new axle - as well as one or two g...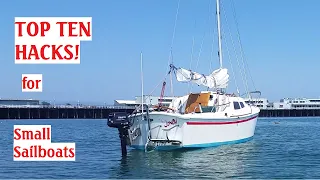
Top Ten Hacks for Small Sailboat Cruising
My Top Ten Hacks for Small Sailboat Cruising #1: laptop OpenCPN chartplotter #2: "Coleman-type" 2 burner stove #3: ice chest #4: Jetboil #5: the heads #6: fish finder - it's a chartplotter, has gps, depth, speed, course #7: Reflectix blinds #8: DIY...
Jonah Goes Fishing ~ The Flying Dutchman ~ #fishing #sailing #opera
Musical short with synchronized audio / video. Just for fun. @johnjordansailing Credits: Der fliegende Holländer, WWV 63: Der fliegende Holländer (the Flying Dutchman): Overture - Columbia Symphony Orchestra, Bruno Walter Content owners: SME, Naxos Dig...
Keel Trunks, Batteries And Gudgeons
If you're going to own a boat, you'd better enjoy fixing it. That or have endless funds to pay someone. Transcript: So, about that keel trunk damage, truth is it's been there a while, and it's high time it got fixed, as it's partly responsible for why I ...
Small Boat Tackles Wild Oceanic Ride! #sailing #sailboat
A mashup of clips from my channel. Check it out for more!
