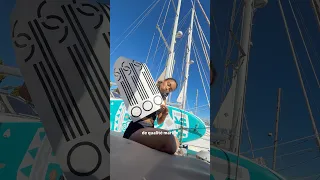
Changer le gréement d’un voilier : tout commence par cette étape !
In the harbor of Port-de-Bouc, the crew of Coraille En Voyage welcomes Gilles, a Marseille-based professional rigger from Sud Rigging, aboard their sailboat Corail 2 to map out a full standing rigging replacement. Rather than waiting until the boat is sitting under the boatyard crane to discover seized fittings or tangled wiring, Fabien, Céanie, and Gilles walk the deck step by step to prepare every stay, turnbuckle, furler profile, and mast cable in advance.
As Gilles explains during their dockside inspection, thorough preparation before reaching the crane operator determines how smoothly the unstepping operation goes once the lifting sling is hooked on. Because every boat layout differs, the crew plans to handle the hands-on rigging replacement work alongside Gilles while relying on his professional oversight for the actual demasting and remasting maneuvers.
“The idea is that when you get to the crane, it goes as smoothly as possible. That’s the idea. The idea is to be ready for anything.”
Gilles, professional rigger at Sud Rigging
Rigging the Crane Strap and Relieving Mast Compression
Gilles starts at the mast step by addressing a common misconception among boat owners: nothing bolts the base of the mast down on a deck-stepped rig like Corail 2. The spar stays seated strictly through the downward compression of the shrouds and stays. Once the standing rigging is slacked and unpinned, the crane can lift the mast straight up.
To rig the lift safely, a crew member climbs the mast with a lifting strap, secures it around the spar using a slip knot, and hooks the crane onto the strap under light tension. To keep that lifting strap from sliding upward when the crane takes the weight of the spar, Gilles rigs a downward restraint line—tied around the strap with a bowline knot—and leads it down to the winch at the foot of the mast. Putting tension on that mast-foot winch locks the lifting point in place.
Before arriving at the crane, the crew also prepares the lower stays so they can be slacked quickly. Gilles rigs a pulley and leads a line across to the opposite stay and back to a winch, pulling the two sides inward together to take the load off the pins while leaving the stays in place until the crane hook is attached. When unstepping in windy harbor conditions, wind pressure on the spar can keep a stay tight even when its turnbuckle is backed out to the end of its threads. Rather than forcing a loaded turnbuckle and damaging the threads, Gilles uses halyards led to a winch to relieve tension on individual stays.
“If it’s a turnbuckle that’s at the front, you use the halyard at the front. You take the halyard with a winch to relieve the cable so that you can disconnect, you see.”
Gilles
For mast climbs during preparation and unstepping, Gilles climbs on 2 halyards going up and keeps 1 halyard forward and 1 aft so the crew can go aloft to attach the crane strap or relieve a tight stay in port.
Freeing Seized Turnbuckles and Roller Furler Profiles
The second major pre-crane task is verifying that every turnbuckle on the boat turns freely. Working while moored in port poses minimal risk as long as each fitting is tested one at a time. Gilles places a tape reference mark on a turnbuckle, backs it off by a quarter turn to confirm movement, and then returns it a quarter turn to its original setting. Starting days ahead of the haulout, the crew sprays the threads daily with WD40, which penetrates tight threads effectively, and applies grease.
If a turnbuckle still resists turning under moderate torque, Gilles warns against forcing it with a long lever bar right away. Instead, the body of the turnbuckle where the threaded rod enters should be heated using a heat gun or a small blowtorch to break the bind before unscrewing it and readying the clevis pins for removal.
Even more critical is inspecting the headsail roller furler before unstepping the mast. Around the forestay wire sit aluminum foil profiles that are typically 3 m to 2 m long, joined together by internal connecting sleeves and centered around the wire by Teflon spacers. Each sleeve is secured by stainless steel screws—usually 2 on each side. Because a newly crimped forestay terminal cannot slide through those internal Teflon spacers, the aluminum furler profiles have to be disassembled to pass the new cable inside.
Years of salt exposure between aluminum profiles and stainless steel screws—often compounded by thread locker applied during installation—create severe galvanic corrosion. Testing whether those small screws back out before the mast comes down avoids a last-minute scramble; if a screw is frozen solid, it has to be carefully drilled out without elongating the hole or ruining the aluminum foil section.
Disconnecting Mast Wiring and Clearing Deck Gear
With the mechanical fittings checked, attention shifts below deck to the electrical cables running inside the spar. While many production sailboats feature an accessible junction box right beside the mast step, Corail 2 has continuous cables—such as the masthead wind vane wire—routed straight into the cabin interior. To allow the mast to lift clear, the crew must cut those runs near the mast base and install a proper junction box.
For standard mast wiring such as navigation lights, Gilles replaces old screw-terminal blocks with Wago lever connectors, explaining, “When I re-mast, I put WAGs back, it’s much easier for me.” On the other hand, the hair-thin conductors inside an anemometer cable are too fine for Wago clamps; for those tiny wires, Gilles twists the conductors together, solders the joint, and secures them inside a small terminal block. Because the existing electrical cables inside Corail 2‘s mast are degraded at both the masthead and the mast foot, the crew plans to pull brand-new wiring through the spar while it is down.
Ahead of crane day, the crew also strips all removable canvas and spars off the boat, taking down the sails, disconnecting the boom, and coiling all spare running rigging neatly at the mast step—leaving only the 2 working halyards forward and aft. Hardware permanently fixed to the spar, including the spreaders and mast tangs, stays bolted in place during a standing rigging refit.
Measuring Standing Rigging and Verifying Axle Diameters
To order replacement wire stays from a rigging supplier such as SVB, Gilles demonstrates how to measure the existing cables accurately and check terminal hardware compatibility. Two measurements must be recorded for every stay:
- Clevis Pin Axle Diameter: Older sailboats often used oversized clevis pins relative to wire thickness. While common pin diameters are 8, 10, or 12 mm, a standard crimped eye on a 5 mm wire normally takes a 5 mm axle unless ordered in an XL eye version sized for the next pin diameter up. Because stainless steel terminal eyes cannot be re-drilled once crimped, ordering the wrong axle diameter prevents reassembly.
- Axis-to-Axis Length and Turnbuckle Margin: Even though a turnbuckle provides roughly a 3 to 4 cm adjustment range and new cables are delivered calculated for a half-open turnbuckle, measurements should be taken as precisely as possible from the center of the upper clevis pin axis to the center of the lower axis.
“When you send them the measurements, you also send them the axle diameters.”
Gilles
| Component / Parameter | Specification Aboard Corail 2 | Preparation Detail |
|---|---|---|
| Vessel | Corail 2 | Inspected in Port-de-Bouc with Gilles (Sud Rigging) |
| Climbing Halyards Kept in Place | 2 halyards (forward and aft) | Used to climb aloft and relieve stay tension with a winch |
| Turnbuckle Test Loosening | Quarter turn with tape mark | Lubricated daily with WD40 and grease before crane day |
| Roller Furler Foil Sections | 3 m to 2 m aluminum profiles | Joined by sleeves with 2 stainless screws per side and Teflon spacers |
| Clevis Pin Axle Diameters | Typically 8, 10, or 12 mm (5 mm on standard 5 mm wire) | Must be measured and specified when ordering crimped eyes |
| Turnbuckle Adjustment Range | 3 to 4 cm margin | Measured center-of-axis to center-of-axis for half-open fit |
Frequently Asked Questions
A lifting strap is secured around the mast with a slip knot, and a separate downward restraint rope is tied to the strap using a bowline knot and tensioned on a winch at the foot of the mast so the sling cannot slide upward when loaded.
Rather than forcing the turnbuckle threads under load, lead a forward or aft halyard to a winch and tension it to relieve the load on the stay so the turnbuckle can be slacked and unpinned safely.
The 3 m to 2 m aluminum furler profiles contain internal Teflon spacers that a crimped forestay terminal cannot pass through, requiring the sleeves (held by 2 stainless steel screws per side) to be unscrewed so the foil can be reassembled around the new wire.
Standard mast wires are connected inside a mast-step junction box using Wago connectors, while ultra-thin anemometer wires are twisted together, soldered, and secured in a small terminal block.
A standard crimped eye for a 5 mm cable normally fits a 5 mm axle, whereas many boats use oversized pins or require an XL eye terminal; because crimped stainless terminals cannot be re-drilled, both axis-to-axis length and axle diameters (often 8, 10, or 12 mm) must be specified.
Book a trip where this was filmed — near Provence

Support Coraille En Voyage
At WeBoating.com, we profoundly acknowledge the unwavering dedication that Coraille En Voyage invests in crafting each and every video or voyage. Their passion for delivering exceptional ocean content shines through every frame, and it's a labor of love that deserves your attention.
We invite you to watch their captivating videos here and actively engage with their content, including their social media links above. Liking, commenting, and sharing their work goes a long way in fueling their creative fire.
We're also inviting you to explore the gear, sponsorships, and boat partnerships highlighted in the "Changer le gréement d’un voilier : tout commence par cette étape !" video description, or directly on YouTube. By engaging with these offerings or purchasing services and items, you directly support Coraille En Voyage, their collaborators, and the brands they're associated with.
To ensure you never miss an offshore update, consider visiting their official YouTube Channel to subscribe, like, and join their community directly.
If you have any feedback, corrections, or additional information about Coraille En Voyage or their videos, please use the comment form below to share your thoughts with us.
Thank you for being a part of our community and supporting the creators we cherish. Your time and support truly matter!
Coucou les copains ! ⛵😊
Comme promis, voici les liens utiles :
⚓ **Notre formation pour apprendre à naviguer** : https://www.voiliercoraille.com
🛠️ **Le site de Gilles et Sud Rigging**, pour tout savoir sur le gréement : https://www.sud-rigging.com/
Un grand merci à tous pour votre soutien et bonne navigation ! 💙
Montage : Fabien,Céanie et Framboise
Musiques:Fabien Lafiandra www.youtube.com/fabguitar38
Merci à Scott Buckley pour ses fantastiques musiques . On ne les utilise pas sur toutes nos vidéos mais si vous aimez la belle musique n'hésitez pas à aller écouter :
www.scottbuckley.com.au'With These Hands' by Scott Buckley - released under CC-BY 4.0. www.scottbuckley.com.au-----
----------Want to learn to sail? You will find the online training to learn navigation and life on board as well as all the guides on our website and take advantage:https://www.voiliercoraille.com/See you soon
Coraille En Voyage
Voilier, TUTOS, voyages et Aventures ! C'est avec un grand plaisir qu'on partage nos différents voyages, astuces et tutos sur le voilier et le bateau en général ! Alors... EMBARQUEZ et BIENVENUE a bord !!! Sailboat, Boat, Adventures! It is with great pleasure that we share our various trips, tips and tutorials on the sailboat and the boat in general! So .. . GET ON BOARD and WELCOME aboard !!!
Channel Information:
Social Media Links:
Changer le gréement d’un voilier : tout commence par cette étape ! Location
- Port-de-Bouc, Provence-Alpes-Côte d'Azur, France (43.4019,4.9814)
- Marseille, Provence-Alpes-Côte d'Azur, France (43.2951,5.3744)
Latest Episodes from Coraille En Voyage
Explore the most recent voyages. Subscribe to the channel to never miss an update!
On pensait simplement préparer le démâtage… mais le bateau en avait décidé autrement ! 🫣
Avant de pouvoir sortir le mât, il faut tout préparer. Au programme : enlever les bômes, les lazy bags, les lazy jacks et bien sûr, toutes les voiles. Sauf que… évidemment, rien ne se passe jamais exactement comme prévu en bateau ! 🙃 On s’est rendu compte que notre génois était complètement coincé...
Un petit quelque chose en moins, non ? 🤔
Et oui, le changement de gréement commence par mettre les mâts à nu ! Tout est démonté : les voiles, les bômes, les cordages… Bref, le bateau se retrouve un peu à poile ! 😅 Et toi, ça t’est déjà arrivé de retrouver ton bateau avec un petit quelque chose en moins ? 😂 Poste ta photo en commentaire, ...
Et toi, qu’est-ce qui te fait ralentir et te sentir bien ? 🌞
On vit dans un monde où tout va vite. Entre le travail, les obligations, la pression sociale et toutes ces choses qu’on s’impose, on oublie parfois de simplement respirer. Alors, de temps en temps, se reconnecter aux choses simples, ralentir, regarder autour de soi et apprécier les petits instants…...
Quel week-end incroyable et c’est grâce à VOUS ! ✨
Rencontrer autant d’entre vous, mettre des visages sur vos messages, échanger, rire, parler de nos aventures et de vos projets… C’est quelque chose qui nous touche énormément et qu’on ne prend absolument pas pour acquis. 🥹 Derrière un écran, on ne réalise pas toujours à quel point cette communauté ...
GRAND-VOILE SUR ENROULEUR … le piège à éviter ?
At Port-de-Bouc, Fabien and Cyril troubleshoot a jammed in-mast furling mainsail on Dufour 35 Petit Corail, stitching a messenger line to replace an elastic halyard and retuning rig tension.