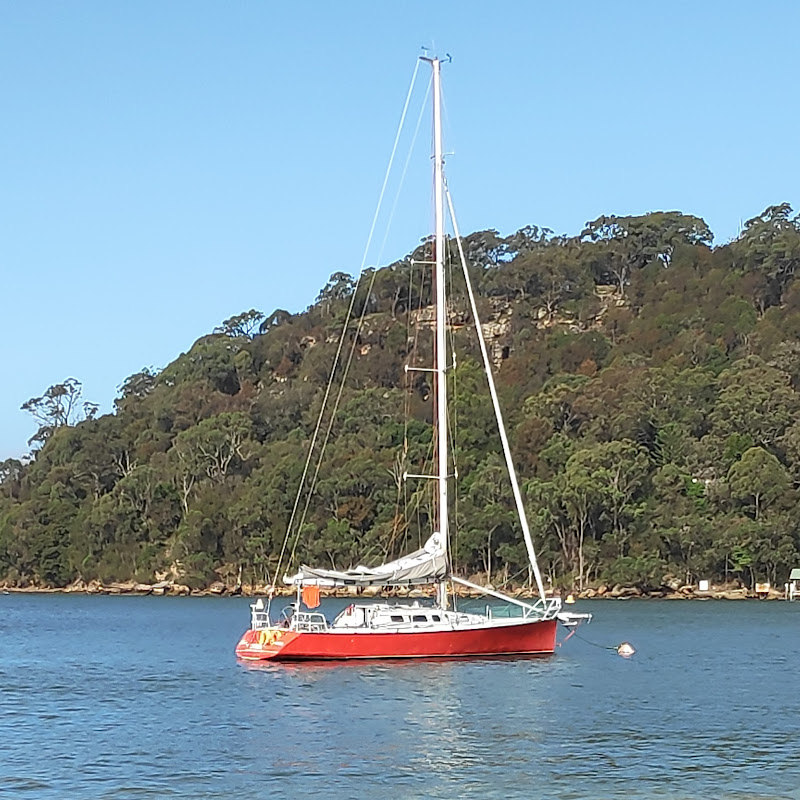
Changing the RIG on my own, turned into an ORDEAL

Changing the Rigging on My Boat Turned Into an Ordeal
I decided to change the rigging on both sides of my mast. It didn’t go as smoothly as I’d hoped, and it took me three attempts to get everything right.Throughout this ordeal, I learned a lot about the importance of precise measurements and quality fittings. Now that it’s done, though, I’m glad I persevered and managed to save some money by doing the work myself.Researching Past Owners and Riggers
One of the challenges I faced was trying to determine when the rigging was last changed by the past owners or riggers. Unfortunately, I couldn’t find a definitive answer, which left me wondering if it might be old or unreliable.Reasoning for Changing Rigging
Despite some concerns about the age and reliability of my existing rigging, I ultimately decided to change it before going on any long trips. As someone who sails often, I want to ensure that everything is in perfect working order and without any potential issues or worries.Components of Rigging
When changing the rigging on my boat, I used 9.5 mm diameter rope for the main sail halyard and bosen’s chair to help me reach higher areas of the mast during repairs or inspections.In addition to the main halyard, I had various other ropes and stays that needed to be replaced, including running backstays, forestay, topping lift, spare halyards, and more. These all work together to keep the mast stable and secure while sailing.Taking apart the Rigging
Changing the rigging involved taking off all of these components one by one, making sure each piece was carefully disconnected and measured before replacing it with a new one. This process took multiple attempts and several setbacks along the way, including having to go up the mast repeatedly to check measurements and connections.Working on the Mast
At one point, I managed to borrow a M-lift winch which made it easier for me to haul myself up the mast as needed. This device was much more efficient than relying on someone else to do it or trying to find someone who could come out to help me.Dealing with Misaligned Parts
While working on the mast, I encountered a few problems related to misaligned parts or incorrect measurements, which resulted in some frustrating setbacks. One of the most difficult issues involved adjusting the height and angle of the spreaders on either side of the mast for optimal support and stability.Fixing the Misaligned Parts
In order to fix this problem, I made custom extension pieces for some of the stays that connected the spreaders to the mast. This allowed me to make adjustments and align everything properly before tightening the rigging once again.Ensuring Proper Tension
To ensure proper tension throughout the rigging, I made multiple trips up and down the mast while gradually adjusting all the connections. This careful process ensured that every component was tight enough to hold securely without putting unnecessary strain on anything else.Replacing Chainplates
I also replaced my boat’s chain plates, which are the metal supports welded into the hull to hold everything in place. Unlike boats made of composite materials, a metal boat like mine has a better chance of lasting longer and not experiencing issues like chainplate failure, which is common in other types of boats.Applying Tef-Gel
Throughout the entire rigging-changing process, I made sure to apply Tef-Gel where needed to help prevent any potential corrosion or seizing in joints. This non-toxic material helps keep everything lubricated and working smoothly.Mistakes Made During the Project
In hindsight, there were definitely some mistakes I made along the way. For example, initially giving all my old wire to the rigger with specific instructions was not ideal, as it didn’t allow for enough flexibility or room for error. If I could go back and change anything, I would create more space for measurement errors and perhaps invest in higher-quality mechanical fittings like star locks.Moving Forward
Looking forward, the most important thing for me now is to move on from this big project and tackle another one soon. The wind self-steerer sitting in my garage has been giving me trouble, so it’s time to take a break from rigging projects and focus on getting that new system up and running properly. With these recent challenges behind me, I feel more confident than ever before to keep improving and upgrading my sailing equipment.Replacing all the wire on the rig while the mast is standing. There were alot of delays and mishaps that went on for more than 2 months.
Please consider supporting the Chanel in any way, Im not a full time youtuber but will do my best to get videos out when I think I have worthy content. To support the channel ..
Patreon https://www.patreon.com/captainscarlegs
Paypalhttps://www.paypal.com/webapps/billin...
Thank you
Audio, no kickbacks for me but these people sent me a mic set and didnt ask for anything in return and its quiet good.
This is the USA Amazon link to the LARK 150USA: https://www.amazon.com/gp/product/B08PKG16X8
Changing the RIG on my own, turned into an ORDEAL Locations
- The boat was built in Tasmania, Australia. (-42.8917,147.3263)
Captain Scarlegs
Sailing enthusiasts. Travel and adventure afloat. Boat improvements. Many hours of work goes into making each video. If you would like to join my Patreon that would much appreciated. https://www.patreon.com/captainscarlegs For food lovers please follow us on YouTube https://www.youtube.com/@LittleKaivitiAngel Instagram @littlekaivitiangel
Channel Information:
Social Media Links:
Note of Recognition for Captain Scarlegs
At WeBoating.com, we profoundly acknowledge the unwavering dedication that Captain Scarlegs and other creators invests in crafting each and every video. Their passion for delivering exceptional content shines through every frame, and it's a labor of love that deserves your attention.
We invite you to watch their captivating videos and actively engage with their content, including their social media links above. Liking, commenting, and sharing their work goes a long way in fueling their creative fire.
We're also inviting you to explore any sponsorships and partnerships highlighted in the video description of "Changing the RIG on my own, turned into an ORDEAL", or directly on YouTube. By considering their offerings or purchasing services and items, you not only support Captain Scarlegs but also the brands and collaborators they're associated with.
If you have any feedback, corrections, or additional information about Captain Scarlegs or their videos, please use the comment form below to share your thoughts with us.
Thank you for being a part of our community and supporting the creators we cherish. Your time and support truly matter!
Captain Scarlegs Lastest Videos
REPAIRING A COMPOSITE SAIL (ep23) ,
The mainsail ripped almost right across, I have a go at repairing the composite sail. carbon technora servicing the Volvo heat exchanger and more. My boat is a Graham Radford designed 14 meter or 46 foot custom built in Aluminum in 1994 in Tasmania Austra...
Sailing Delivery New Zealand to Fiji
Delivery of the sailing vessel Firefly, a lagoon 500 catamaran from New Zealand's Bay of islands Opua to Vuda Marina Fiji via Minerva Reef, catching lobsters from the reef. The voyage is 1240 nautical miles.
Cheap AIS Transmitter and Mainsail reefing (ep21)
A cheap self contained AIS transmitter from alibaba. Plus how i have set up my mainsail reefing. im not reinventing the wheel but most boats have a single line system, Ive had both and i think this system is better.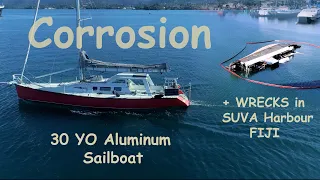
Corrosion on a 30 year old ALUMINUM sailboat + Wrecks
Haphazard is over 30 years old and i go over how the boat is set up to combat electrolysis and corrosion. Plus a montage of visable wrecks in Suva harbour in the Fiji Islands
Sailing Delivery TONGA to FIJI Lagoon 500, Vavau to Port Denerau 550NM
Captains job to sail a lagoon 500 from Vavau Tonga to port Denerau Fiji. Just under 3 days traveling 550 Nautical Miles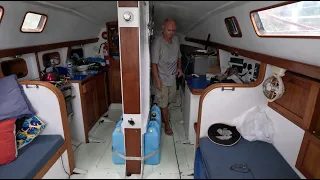
Fresh Water Solutions and Manual Hydraulic Pump for keel.
Building an interior rack to hold water Gerry cans, water maker, fitting a manual backup hydraulic pump for the keel. And more stuff only sailing boat enthusiasts may be interested in.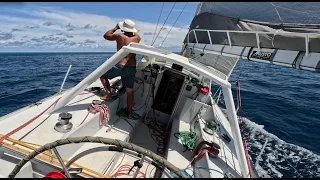
Orca, Sailing, Fishing and more in Fiji
Some sailing and fishing around Suva , Orca Navigation, spinnaker , maintenance, fresh water flush on the engine, sailing to the western side of fiji and back , My boat is a Radford 14 metre, Designed by Australian Graham Radford and built in Launceston Ta...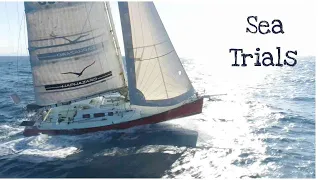
OFFSHORE TESTING New wind self steering Provane (ep16)
As I say in the video a wind self steering is all important to me. Electric autopilot are easy to use but can fail and battery's will need extra charging.. Mechanical wind self steering are less likely to stop working and dont make any noise, but do requi...
Changing the RIG on my own, turned into an ORDEAL
In this episode of Captain Scarlegs, watch as he takes on the challenge of changing the rigging on his own. Despite some mishaps along the way, he perseveres to get the job done right. Learn about the tools and techniques used in this impressive DIY projec...
Boat Tour ‘Haphazard” 14m Aluminium sailing (ep5) Posted in September 21, re-post music copywright
This was posted in September 2021 but I got done for music copyright. It was bugging me because it was posted as copyright free music but later the vid got a strike. so the vid is not up to date. Going over some of the features on Haphazard, rig, lifting ...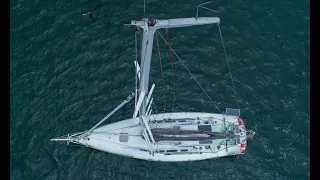
Painting head-sail UV, deck & water catchment
My boat is a Graham Radford designed 14 meter or 46 foot custom built in Aluminum in 1994. Rather than have a sail maker sew a sunbrella UV strip to my number 3 working head sail I painted the UV strip on the sail. This is to stop the sun damaging the sail...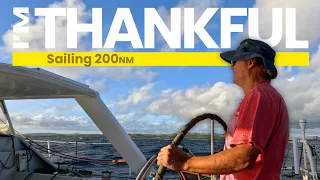
Sailing again and sister-ship Wildcard info(ep 13)
The hydraulic keel is fixed and I'm off sailing the 100 miles each way to the western side of Fiji for haul out and talk about the sister ship "Wildcard" Please consider sponsoring the Chanel in any way, To support the channel .. Patreon https://www.p...
NICE RIG inner fore stay for a STORM jib (ep12)
Removed the mast for a proper inspection and fixed a few issues, added a inner fore stay and Dyneema runners for a storm jib. replaces the house bank of batteries X3 the capacity. To support the channel .. Patreon https://www.patreon.com/captainscarleg...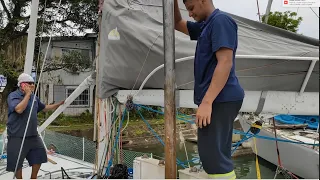
Evidence of a collision + sailing boat projects 11 months in the making (11)
The keel hydraulic ram broke by me calling a dodgy mechanic from the phone book. The whole process of repair has been delayed many times and so far has taken 11 months. The end is near and progress has been made. Also a heaps of boat projects including fi...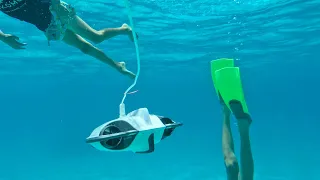
Working with an underwater drone in the kadavu island group in Fiji (Ep10)
Using an underwater drone for the first time while working in the kadavu group of island in Fiji. The underwater drone is called a SeaRay. The link below with a 10% off code. discount code:Captainray Store Link: http://bit.ly/3ifjz9f Amazon Link: http://...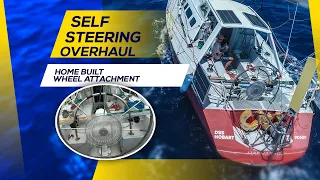
Wind Self steering and home built wheel adapter on Radford 14m sailing (Ep9)
Ive reposed this video to fix a mistake. Monitor wind self steering unit overhaul, building a wheel adapter and foam sandwich air vane. The hydraulic ram to lift and lower the keel has been removed for repair and has been not working since the start of 20...
Boom Bracket and Surviving a Tsunami (Ep8)
Building a custom Boom bracket to support the mainsail and an enormous volcanic eruption on close by Island Tonga sends a Tsunami our way. Please consider sponsoring me in any way, please support the channel Thanks Patreon https://www.patreon.com/c...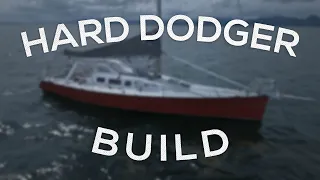
Hard Dodger build in Aluminum (Ep7)
Haphazard conversion to a cruising yacht continues with building a hard dodger . To keep the spray, waves, rain and sun off and make sailing a whole lot more comfortable on deck. Aluminum construction, an overview of the building. Please consider sponsorin...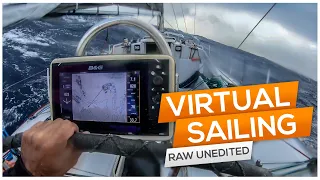
Virtual Sailing, RAW video on deck Sailing from Australia to Fiji (Ep6)
For the Sailing Enthusiast Everything on deck the good the wobbly the water on lens unedited from start to finish from https://www.youtube.com/watch?v=Im8QIRPYf3s&t=253s . its very long but if you had a hard day and want to unwind and transport yoursel...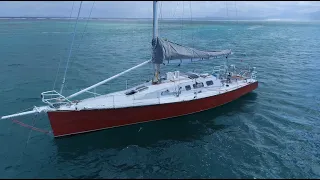
Debrief Sailing Australia to Fiji (Ep4)
A quick debrief after arriving in Fiji. Answering some of the comments. Please consider sponsoring me in any way, it would be put to good use converting Haphazard into a cruiser. Thanks Patreon https://www.patreon.com/captainscarlegs Paypal https://ww...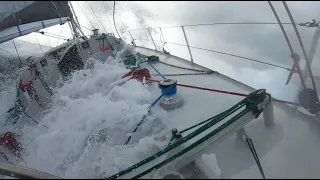
Single Handed Sailing from Australia to Fiji (Ep3)
Single handed sail from Southport Australia to Fiji. Hit something at night and put a hole in the boat. five days of strong trade winds over 30 knots Please consider sponsoring me in any way, please support the channel Thanks Patreon https://www.pa...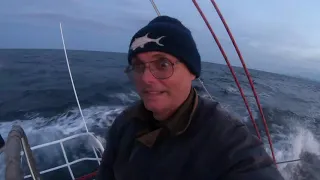
Sailing 1000nm, Hobart to Ballina Australia (Ep2)
The first sail I'm joined by friend Ross from Hobart Tasmania to Ballina NSW. Australia Please consider sponsoring me in any way, please support Thanks Patreon https://www.patreon.com/captainscarlegs Paypal https://www.paypal.com/webapps/billing/plans...
Buying a sailing yacht online without seeing it (Ep1)
With all the Covid restriction it made it almost impossible to view the boat, so this is what I did to buy a 14 meter aluminum sailing boat in Hobart Australia from the Fiji Islands Please consider sponsoring me in any way, please support the channel i...
Something AWESOME is coming!
Be the FIRST to know⛵
Sign up for exclusive updates and be the first to hear when we go live!
Get sneak peeks, exciting announcement, and special content straight to your inbox!
We don’t spam! Read our privacy policy for more info.
