Little Hands for a Little Caulk in a Little Crack (MJ Sailing Ep 331)

How To Fill Small Cracks In A Boat Project Using Little Hands
In this episode of MJ Sailing, we continue our journey in transforming a small crack on the boat’s hull. Utilizing only our little hands and determination, we aim to provide an insightful guide to sealing those pesky leaks without professional equipment. Get ready for an adventurous learning experience!
A Closer Look at the Crack
The crack we’re dealing with is situated where the cockpit seat meets the bulkhead, showcasing noticeable gaps and inconsistencies. This problem not only needs immediate attention but also requires a careful touch and understanding to prevent future water ingress.
Choosing The Right Caulking Material
In selecting the ideal caulking material for our project, we went with 3M Marine Adhesive Sealant. Its white color would seamlessly blend into our boat’s design while offering flexibility and durability against water exposure.
Preparing The Crack For Caulking
To ensure a smooth application, the crack needed some preparation. We filled it with a thickened resin, giving us room to manipulate and shape the material as desired. This method provides not only better adhesion but also allows for easier sanding once cured.
Step-By-Step Application Process
- Begin by cutting a small hole in the tube’s cap of the 3M adhesive to allow proper flow.
- Start with small beads on the edges of the crack, focusing on vertical and horizontal alignments for stability.
- Gradually move towards filling larger gaps, applying generous amounts of caulking material where needed. Be mindful that it may require multiple passes depending on how much product has already been used or has hardened within the crack.
- Use a plastic stick or gloved finger to press the adhesive into place and remove excess material, ensuring a smooth and even finish.
The Challenge Of Small Spaces
Working with such tiny spaces was undoubtedly one of our episode’s main highlights. Despite having ‘little hands,’ we faced difficulties reaching certain corners and deeper areas within the crack, resulting in uneven application and potentially needing additional layers to smooth out the surface.
Final Thoughts And Next Steps
In conclusion, sealing cracks using nothing but your hands requires patience, skill, and creativity. Despite our initial struggles, we persevered and managed to complete the task effectively. Now that we have filled the visible gaps on this section of our boat project, our attention shifts towards bonding pieces in place for the helm area, laying down tracks for sliding doors, and ensuring proper water resistance around these structures.
Staying Tuned
Don’t forget to subscribe for more content on DIY boat maintenance! Stay tuned as we venture into fixing the inconsistencies, reinforcing structural integrity, and completing our sailing yacht transformation – one day at a time.
The number of innuendos I didn't even know I made.
I need to add a white caulk to the seam where our cockpit seats and bulkhead come together, and at 6cm wide, it is no easy task.
Matt and I have been working hard in the tent, and we're all about prepping areas for the helm and cockpit doors!
While we're not there yet, these steps are pretty important and will let us move on to the bigger things soon enough. Matt is getting areas of the helm and storage locker ready to bond into place, but has held off on the locker until I can do my job.
While prepping, he has bonded the forward side and top together, so the will be able to plop into place once I finish my work on the sill, and door tracks are added. In the meantime, he's making those (what will be) unreachable areas look good while we still have access to them. A few layers of gelcoat are sprayed on, and then buffed out.
My job is a lot less fun and much more of a pain in the a$$. I need my tiny little hands and arms into the area between bulkhead 6 and the cockpit seat, where the doors will slide into when open. Nearly 3 years ago when we first bonded in our cockpit seats it left open seams, and we never addressed them until now.
I go in to fill the larger cracks with thickened resin, and the next day, clean the area up with some compound and polish. Then comes the nerve wrecking task of spreading a nice looking bead of caulk in that area. We use some of 3Ms UV resistant adhesive, but from beginning to end I suffer through problems with it.
We hope you enjoy!
P.S. If you have spring projects on your own boat and would like 5% off your purchase of Total Boat products, make sure to use our link here!
https://www.totalboat.com/MJSailing
Much love,
Jessica, Matt & Georgie
Link to our boat: https://maxcruisemarine.com/
Thank you SO MUCH to our Patrons. These amazing supporters help keep us on the boat, our camera equipment up to date, and the videos coming. Without our patrons, these videos would not be possible.
To join the Patreon ranks, please visit:
https://www.patreon.com/mjsailing
or
Buy us a beer through PayPal! https://www.paypal.me/MJSailing
or
Help contribute to the build by shopping our Amazon Wish List!
https://www.amazon.com/hz/wishlist/ls/2B2BOYEH9THAH/ref=nav_wishlist_lists_1
Delivery address:
Kentmorr Marina
910 Kentmorr Road
Stevensville, MD 21666
Thank you!, Matt & Jessica
Videos made by Jessica, featuring Matt and Georgie.
00:00 - This isn't a boat - it's our home
03:15 - Creating access to service the winches
06:16 - Filling the seams in the door pockets
11:36 - The set-up of our helm storage area
18:06 - Spraying gelcoat and buffing
19:54 - Prepping to caulk the pocket cracks
28:04 - Closing
Music:
If You're Down I'm Down - Mindme
Lighting Up My Space - Mindme
So Sick of Love - Mindme
Thunder 100 - Superintendent McCupcakes
Pandemonium (Tribute Version) - The Mondays
Camera equipment used:
- Google Pixel 7
- GoPro Hero 8
- DJI Osmo Action 4
Previous Boats: 1983 Trisalu 37 - custom aluminum, built in Quebec (Elements of Life) Where we've been: 2.5 year refit in Indiantown,
Florida; Abacos, Bahamas; St. Barth's; St. Maarten; Antigua; Saba; Azores; Ireland; Scotland; Norway; England 1989
Sabre 34 Targa (Serendipity)
Where We Sailed Her: U.S. - Bahamas - Jamaica - Cuba - Cayman Islands - Honduras - Guatemala - Belize - Mexico - Bermuda - Azores - Madeira - Canary Islands - Sint Maarten - BVI's - USVI's
Editing software: Adobe Premier Pro
Website: http://www.mjsailing.com
Facebook: / mattandjessicasailing
Instagram: / mattandjessicasailing
& / mj_wayfaring
MJ Sailing
Sailing the world to see the world! We're a couple of high school sweethearts in our late 30's that have been on the move for 9 years; creating videos of the ups, the downs, our triumphs and our trials. After circumnavigating the North Atlantic in our last boat Serendipity, (1989 Sabre Targa 34), we took on a 2 year complete refit of our new boat Elements of Life - a custom aluminum 37' monohull. After sailing her to the Arctic, we sold her in 2020 to begin our newest project of building a 42 ft catamaran. Check out our website for more information, and support us by subscribing to our channel and liking our videos. Want to support the production of our videos? - Become part of our Patreon family and get videos before anyone else! - https://patreon.com/mjsailing - Make a donation through the PayPal link on our website - http://mjsailing.com - General inquires, please contact us at: [email protected]
Channel Information:
Social Media Links:
Note of Recognition for MJ Sailing
At WeBoating.com, we profoundly acknowledge the unwavering dedication that MJ Sailing and other creators invests in crafting each and every video. Their passion for delivering exceptional content shines through every frame, and it's a labor of love that deserves your attention.
We invite you to watch their captivating videos and actively engage with their content, including their social media links above. Liking, commenting, and sharing their work goes a long way in fueling their creative fire.
We're also inviting you to explore any sponsorships and partnerships highlighted in the video description of "Little Hands for a Little Caulk in a Little Crack (MJ Sailing Ep 331)", or directly on YouTube. By considering their offerings or purchasing services and items, you not only support MJ Sailing but also the brands and collaborators they're associated with.
If you have any feedback, corrections, or additional information about MJ Sailing or their videos, please use the comment form below to share your thoughts with us.
Thank you for being a part of our community and supporting the creators we cherish. Your time and support truly matter!
MJ Sailing Lastest Videos
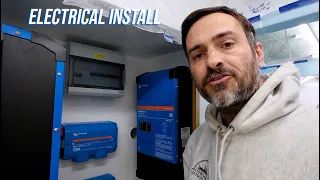
The Victron Electrical Install Begins! (Major Milestone for Our Self Built Catamaran) – Episode 373
This week marks a huge milestone in our catamaran build as we finally begin installing the electrical system. After months of planning and prep work, we take a trip to Annapolis to meet up with our friend Ryan, CEO of Dakota Lithium Batteries. While our ba...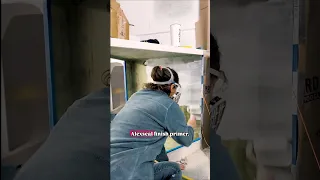
Raw Fiberglass ➝ Finished Cabinet (Boat Build Transformation!)
Turning this cabinet from raw fiberglass into a finished, painted space took more steps than it looks: sand, wipe down, TotalFair skim, primer, and topcoat. Not perfect… but it definitely passes the five-foot rule 😅⚓️ Full episode: MJ Sailing – ...
Six Layers of Fiberglass and Zero Regrets (MJ Sailing – Episode 372)
Overbuilding the engine bed might seem excessive… until you factor in weight, torque, vibration, and a moving ocean. In this episode, we lift and align our diesel engine, temporarily set it in place, then pull it back out so Matt can glass the engine m...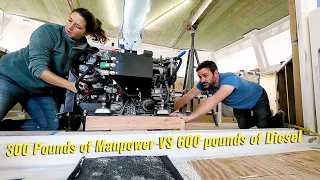
One Diesel Engine, One VERY Tight Space!! (MJ Sailing – Episode 371)
Six hundred pounds. Inches of clearance. And absolutely no room for mistakes. Now that the engine is finally inside the cockpit, the next challenge is getting it the rest of the way into the boat — and this part might be even harder than the lift itself...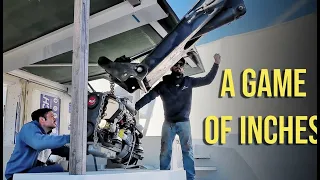
Diesel Engine Lift on a Catamaran – With EXTREMELY Tight Clearances (MJ Sailing – Episode 370)
When heavy equipment meets tight clearances, things get interesting fast. This episode is one of those moments where everything slows down, everyone’s watching closely, and every single inch matters. We’re getting our diesel hybrid engine off the grou...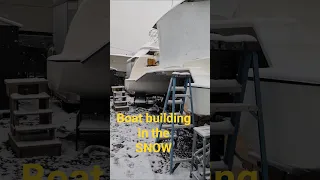
Winter Boat Projects Don’t Wait for Spring
When winter shows up, the build doesn’t slow down—it just gets… creative. With the cockpit shrink-wrapped, a single zippered doorway as our gateway to the cold, and our diesel heater pushing warm air wherever we need it, we’re keeping this project...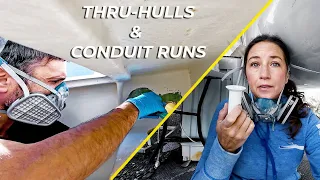
She Drills Holes, He Fills Them (MJ Sailing – Episode 369)
This week’s episode jumps right into the fun stuff—Jessica’s back in the engine bay, drilling out two new holes in the starboard engine bed for a pair of thru-hulls we’ll be installing. It’s one of those jobs that sounds simple until you’re dan...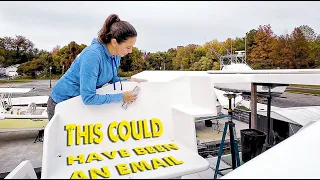
This is the END!! Of Sanding Season. (MJ Sailing – Episode 368)
This week’s episode is a mix of random projects we’ve been tackling around the boat all summer — the kind that never quite fit into any other video but still show the day-to-day progress of the build. We’re checking in on the helm station, which h...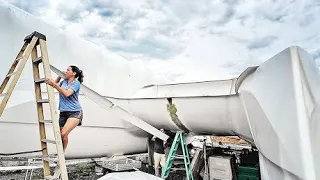
Aligning the Longeron & Forebeam on our Homebuilt Catamaran (MJ Sailing – Ep 367)
After weeks of sanding and fairing (the least glamorous part of boatbuilding), we finally get to do something exciting — bringing the bows of our catamaran together! The longeron and forebeam are two critical pieces that tie the front of the boat into s...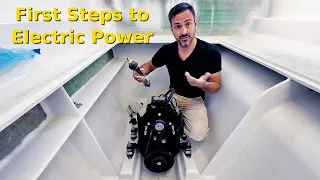
Installing Our Electric Motor System | Milling, Mounts & First Fitting (MJ Sailing – Ep 366)
We’re officially kicking off the installation of our electric drive system! ⚡️ Back in the spring, we received our electric motor, but we couldn’t move forward with fittings until our couplers were milled to the proper size. With that step now com...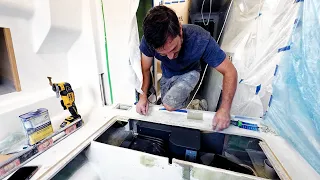
Getting Ready to Install Our FIRST EVER AC!! (MJ Sailing – Ep 365)
Can you believe we're finally getting to the install part of our build?? Although, since most things won't get permanently mounted until the end, I guess we could call this a fitting, haha. This week we prepare for the install of our 9k BTU AC unit from M...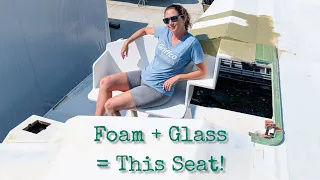
Building Our Custom Helm Seat – Foam, Glass & Vacuum Bagging (MJ Sailing – Ep 364)
This week, we’re diving into a project that’s been quietly taking shape in the background: building our helm seat from scratch. While it might seem like a small piece of the boat, it plays a major role in both comfort and functionality—so we wanted ...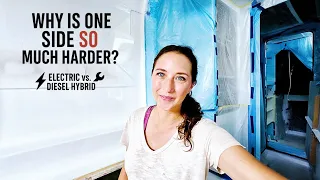
Diesel Demands Space, Electric Plays Nice (MJ Sailing – Ep 363)
We’re back in the engine bays this week, continuing to prep both sides of the catamaran for our twin propulsion systems—an electric motor in the starboard hull and a diesel-electric hybrid in the port hull. After receiving our full system from Hybrid ...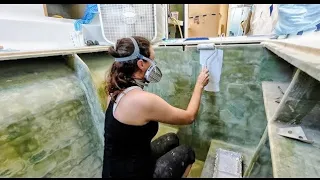
Making Room for 300 Pounds of Power (MJ Sailing – Ep 362)
We're prepping our catamaran engine beds for a brand-new hybrid propulsion system—an electric motor in one hull, and a 300+ pound diesel-electric hybrid in the other. In this episode, we tackle fiberglass reinforcements, fairing work, and reveal how we p...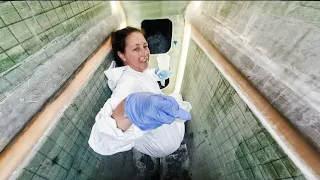
Glassing on our Catamaran Bows – After I Clean Up a TOUGH MISTAKE (MJ Sailing – Ep 361)
Get a FREE pair of crew socks with your 100% waterproof Vessi shoes! https://crrnt.app/VESSI/y6920bP9 We’ve got both bows bonded onto our catamaran now, but before we can start glassing them in place, we run into a tough—and time-consuming—setback. ...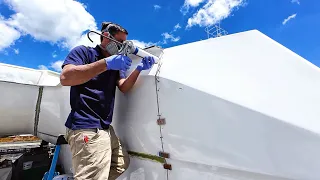
WE SCREWED UP Last Time. Here’s How We Fixed Our Custom Catamaran Build (MJ Sailing – Ep 360)
Go to https://nordvpn.com/mjsailing to get 4 extra months on a 2-year plan!! Just use code MJSAILING A huge thanks to this video's sponsor NordVPN. ALL PROCEEDS go directly to materials for custom build catamaran. This week we once again try bonding a b...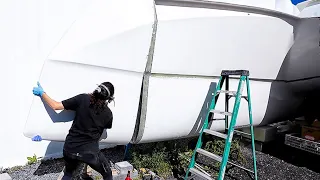
EXTENDING Our Custom Build Catamaran by THREE FEET! (MJ Sailing – Ep 359)
Get 15% off your data plan for Saily by using code MJSAILING. Follow this link: https://saily.com/mjsailing We’ve waited years to attach the bows—and one wrong move could ruin it. Watch as we finally take the leap to bond them on. We're so happy the ...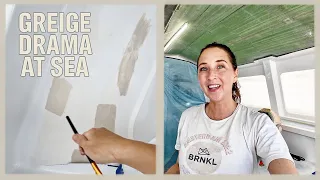
CATAMARAN BUILD – Picking Interior Paint For Our Boat (MJ Sailing – Ep 357)
Get your hands on THE BOOK: The Ultimate Guide to Rebuilding a Civilization Use code MJSAILING10 (10% discount, valid 1 month) https://mdsh.io/e2hrx7340f thebook #howtorebuildcivilization #hungryminds I'm so happy to tell you that we're 5/6ths of the way ...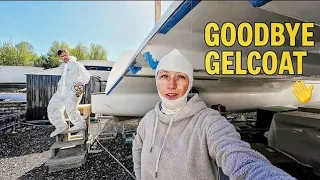
Catamaran Build – SUIT UP TO STRIP DOWN!! (MJ Sailing – Ep 357)
Use code MJSAILING at the link below to get an exclusive 60% off an annual Incogni plan: https://incogni.com/mjsailing We're at Stage 4 of painting, which means more work on the bridge deck! Because of the tight spaces and the hose of pressure/air that f...
We Have Our Hybrid Engine – HOW DO WE INSTALL IT?!?!(MJ Sailing – Ep 356)
Click the links below and use my code 25EFSMMJSA for an extra 5% off @EcoFlowTech WAVE 3 and GLACIER Classic. (The code is valid until May 25 and cannot be combined with other coupons). Get a free 110W solar panel with your WAVE 3 order(From April 25 to...
CATAMARAN BUILD: It’s Really Happening – Interior Paint Begins After 3 YEARS (MJ Sailing – Ep 355)
Click the links below for an exclusive discount on the @EcoFlowTech GLACIER Classic from April 18 to April 24! Pay $100 and get $300 off the GLACIER Classic. (The coupons can be redeemed between April 25 and May 25). EcoFlow GLACIER Classic: https://bit....
CATAMARAN BUILD: From Seams to Smooth – Cabin Top Progress Continues
From three pieces into one, we're now continuing work on our cabin top. A coat of primer brings our cabin top seams closer to disappearing—plus adds vital UV protection to the fairing work beneath. In this week's video we turn to work on the exterior an...
OH GLORIOUS SANDING!! All The Tools We Use to Get the Job Done (MJ Sailing – Ep 353)
Last chance to enjoy the Early Bird Deal for Everfrost 2: Pay $10 now to save $300 later, plus get a free gift: https://ankerfast.club/jmsb9o #AnkerSOLIX #Everfrost2 #electriccooler #outdoorfridge #campingfridge Once again we apologize for the silence thr...
Why You Haven’t Heard From Us the Past Month (MJ Sailing – Ep 352)
Temperatures dip well below freezing as we try to stay warm aboard our 31' liveaboard boat during our off hours, and we work hard to keep the catamaran at a minimum of 55 degrees so we can continue to work through the cold. We wish we had a more interest...
Something AWESOME is coming!
Be the FIRST to know⛵
Sign up for exclusive updates and be the first to hear when we go live!
Get sneak peeks, exciting announcement, and special content straight to your inbox!
We don’t spam! Read our privacy policy for more info.
