5 tips for applying KiwiGrip

Transform Your Painting Game with 5 Expert Tips on Applying KiwiGrip
Revolutionize your home painting experience by harnessing the power of KiwiGrip paint rollers. Designed to deliver a smooth, even finish with minimal effort, these innovative tools can elevate any DIY project. However, knowing how to use them effectively is key. In this article, weu2019ll share five game-changing tips for applying KiwiGrip that will transform your results and simplify the painting process.
To help you achieve a flawless finish with your next home improvement project, follow these easy-to-implement techniques:
1. Roll in Multiple Directions to Remove Paint Drips
Avoid unsightly paint drips by rolling the KiwiGrip roller in various directions while itu2019s still wet. This simple trick allows the excess paint to distribute evenly across the surface, resulting in a pristine finish with minimal touch-ups required.
2. Roll Gently and Slowly for an Even Application
To prevent paint from flinging all over the place, approach your roller application with precision. Move it gently and slowly across each section of wall or ceiling, ensuring a consistent coat that covers evenly without creating messy overspray.
3. Peel Off Tape as Soon as Youu2019re Done Rolling
Time is of the essence when it comes to removing masking tape after applying KiwiGrip. To minimize any potential smudging or bleeding, remove the tape as soon as you finish rolling in each area. This quick action will help maintain clean lines and borders along your paint edges.
4. Keep Temperatures Low for Longer Working Times
For optimal results, work with KiwiGrip at lower temperatures between 50-75u00b0F (10-24u00b0C). This temperature range allows the paint to adhere properly and reduces the risk of cracking or peeling over time. Additionally, ensure proper ventilation by opening windows and running fans while painting.
5. Enlist a Team for Effortless Application
To streamline your painting process even further, consider enlisting the help of friends or family members to share tasks. Assign one person to spreading and taping off walls before you begin rolling, another to assisting with the roller itself, and a third individual for removing masking tape once finished. By dividing responsibilities among team members, everyone can work together harmoniously towards completing your home painting project efficiently.
With these five expert tips in hand, applying KiwiGrip has never been simpler or more rewarding. Elevate the quality of your DIY paint jobs with ease, and revel in the smooth finishes that reflect your dedication to excellence. Transforming your walls has never looked this good!
After applying KiwiGrip on two different boats and talking to other sailors and boaters, we have compiled a list of tips that we know will make your kiwigrip job go smoother!
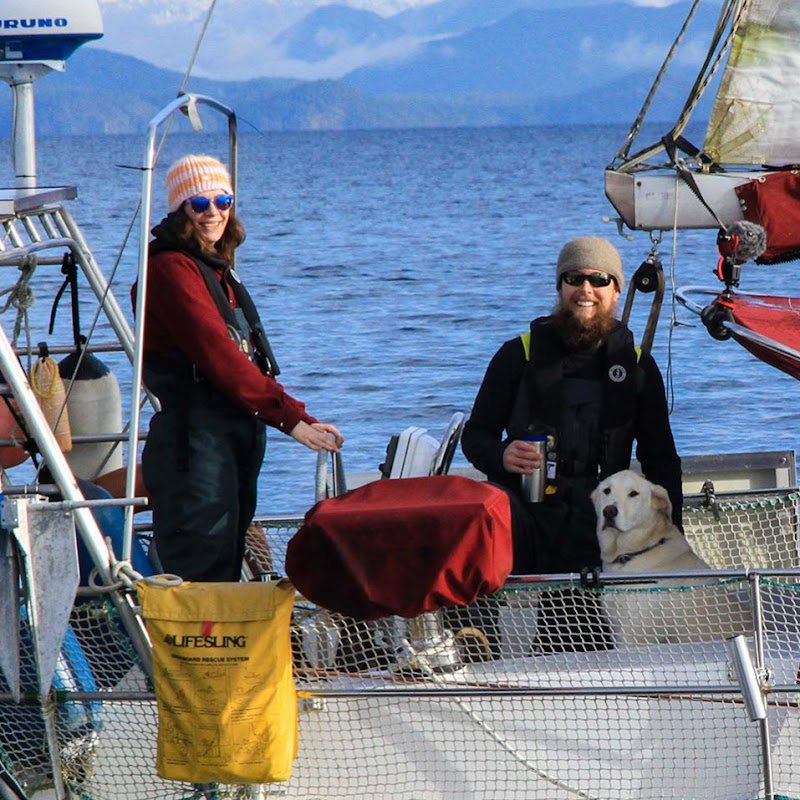
Wayward Life Sailing
Taryn, Logan & Max We are currently living on Vancouver Island on our 40 ft Van De Stadt Norman 40 Sailboat Papa Rumba, with our puppy dog Max. Our videos show you our sailing adventures both above and below the water and our travel adventures. Emphasis on sustainability, ethical travel, nature and living with the smallest environmental footprint we can without going insane. We share sailing, hiking, road trips, camping, and exploring new places, as well as what it's like to live an alternative lifestyle on the water.
Channel Information:
Social Media Links:
Note of Recognition for Wayward Life Sailing
At WeBoating.com, we profoundly acknowledge the unwavering dedication that Wayward Life Sailing and other creators invests in crafting each and every video. Their passion for delivering exceptional content shines through every frame, and it's a labor of love that deserves your attention.
We invite you to watch their captivating videos and actively engage with their content, including their social media links above. Liking, commenting, and sharing their work goes a long way in fueling their creative fire.
We're also inviting you to explore any sponsorships and partnerships highlighted in the video description of "5 tips for applying KiwiGrip", or directly on YouTube. By considering their offerings or purchasing services and items, you not only support Wayward Life Sailing but also the brands and collaborators they're associated with.
If you have any feedback, corrections, or additional information about Wayward Life Sailing or their videos, please use the comment form below to share your thoughts with us.
Thank you for being a part of our community and supporting the creators we cherish. Your time and support truly matter!
Wayward Life Sailing Lastest Videos

Fog, and Storms, and Homeward Bound | Ch 6 E 19
After an amazing time relaxing after sailing down Johnstone Strait, it's finally time for us to head back home to Nanaimo. But with both fog and storms in the forecast, this autumn sailing isn't going to be nearly as easy as the summer was. Patreon: ht...
The BEST DAY of My Life! | Ch 6 E 18
After two amazing months in the Broughton Archipelago, between Vancouver Island and mainland British Columbia, it's time to head home. We had so many incredible experiences in that time, but it was about to get so much better than we could even imagine... ...
Life on a Boat with an OLD Dog | Ch 6 E 17
With an aging dog on our boat, sailing has become more difficult, but we have worked to find a couple of solutions to keep both him and us happy on the boat as he becomes less mobile. Both Seadek and a fancy dog harness have made a world of difference when...
Fjords, Waterfalls and Orcas: Exploring the Canadian Wilderness | Ch 6 E 16
After leaving Alert Bay we head back into the Broughton Archipelago and are greeted by some incredible animal sightings and equally as incredible scenery! Patreon: https://www.patreon.com/thewaywardlife Buy us a coffee: ko-fi.com/waywardlifesailing Websi...
The fight for Wild Salmon in the Land of the Killer Whale People | Ch 6 E 15
At the beginning of our journey back south, we sailed our boat to Alert Bay on Cormorant Island where I had the privilege of interviewing the Namgis Chief Ernest Alfred and chatting about culture, his community and the fight against fish farms in the Broug...
FORCED to LEAVE PARADISE | Ch 6 E 14
After three years of dreaming of being back in the Broughton Archipelago, we are finally heading to our favourite anchorage. But our adventures here will not go as planned… Thanks to Mae for the extra footage, and extra shout out to our patrons for the...
It’s Time For Some Fun! Ch 6 E 13
Patreon: https://www.patreon.com/thewaywardlife Buy us a coffee: ko-fi.com/waywardlifesailing Website: http://www.the-wayward-life.com Instagram: http://www.instagram.com/the.wayward.life Facebook: http://www.facebook.com/the-wayward-life Get 10% off your...
The REALITY of Life in Western Canada | Ch6E12
Out here in the wilds, we get to see some of the most beautiful scenery in the world. But sometimes that beauty isn't exactly what it seems.... To learn more about old growth logging in BC and the state of our forests, visit ancientforestalliance.org Re...
Better than our WILDEST DREAMS- Life in the Brougton Archipelago | Ch6E11
After making our transit through Johnstone Strait, we are ready to head into the Broughton Archipelago at the Northern end of Vancouver Island to try and catch some salmon, but of course the journey to do that won’t be as easy as it seems. Clam garden...
Johnstone Strait- The Gateway to the Broughtons | Ch6 E10
We are continuing our trip north as we head to the brougton archipelago- but in front of us is Johnstone Strait- one of the scariest bits of water around Vancouver Island. But cruising through this area is our only feasible way to reach our goal. Patreo...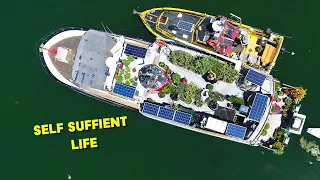
Floating Homestead in the Pacific Northwest | A Boat with a Full Garden
We visit our friends Jim and Laurie on their wooden 60 Foot Ed Monk designed power boat that they have turned into a floating (almost) self sufficient homestead on the water. An entire level of their boat is garden, where they grow everything from beans t...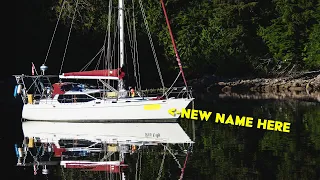
How NOT to Rename a boat | Ch 6 E 9
After an intense boat restoration, we decided to give our boat a new name. What should have been a pretty straight forward renaming process turned into a bit of a mess, like everything else seems to with this boat :| Read the script here: https://destina...
DANGEROUS CURRENTS on BC’s Coast | Ch 6 E 8
fter leaving Cortes Island, we decide to head to a beautiful place we have heard amazing things about. But in order to reach the next destination in the Discovery Islands, we have to traverse some very dangerous tidal currents that could sink our boat if n...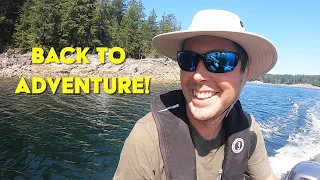
THREE YEARS in the Making- The Adventure Begins! | Ch6E7
After almost 3 years of our boat on land and one sketch sail, we are finally ready to get back to cruising, and reach that relaxation we have been hoping for for so long. But will the weather and our boat cooperate? Donate to Support saving forest on Cor...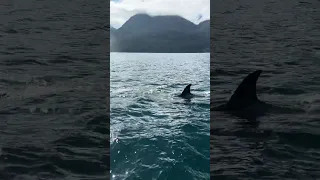
ORCAS SURROUND OUR BOAT
Orcas (killer whales) surrounded us while we were sailing our boat in western Canada. Completely the coolest experience we've ever had!
In Over Our Heads on Our Maiden Voyage | Ch 6 E 6
After almost three years of rebuilding our steel sailboat, we are finally ready to actually sail her again, or we so hope. We haven't tested any of her systems and we don't know if she is ready to go. But we decide to journey out anyway, and find a lot m...
We’re Getting Kicked Out- Again | ch 6 E 5
After a month and a half of boat projects in the marina, and two and and half years rebuilding our boat on land, we are getting close to being ready to travel on our sailboat. But we still aren't ready... and getting ready is about to get a lot more compli...
The Last Step to Off- Grid Living | Ch 6 E 4
Embark on an adventurous journey with Wayward Life Sailing as they share the ins and outs of installing their solar panels. From facing unexpected issues to seeking professional help, learn how this duo tackles off-grid living on their steel boat.
The GROSSEST part of Boat Life | Ch 5 E 3
In this episode of Wayward Life Sailing, Taran and Logan tackle a crucial boat maintenance task - rebuilding their boat's toilet. They face unexpected obstacles but persevere to achieve success.
the BEST DINGHY you’ve never heard of | ch6 e2
In this video, Wayward Life Sailing shares their excitement about their new Swellfish inflatable dinghy, highlighting its unique features and advantages over their previous models. The crew explains the reasons behind their choice and takes viewers on a te...
We Have Nowhere To Go! | Ch 6 E 1
Wayward Life Sailing faces the challenge of finding a slip for their boat in a busy marina after months of hard work to restore it. Their quest leads them to an island where they try to relax while facing various setbacks and a race against time to get thi...
Something AWESOME is coming!
Be the FIRST to know⛵
Sign up for exclusive updates and be the first to hear when we go live!
Get sneak peeks, exciting announcement, and special content straight to your inbox!
We don’t spam! Read our privacy policy for more info.
